
 Yahoo News
 10 Tips For Amazing iPhone Holiday Photos

From blurry snaps of exotic cocktails to wonky horizons and washed-out sunburnt faces, holiday photos taken on smartphones can be atrocious.
While smartphone cameras have improved so much in recent years that lots of people have ditched their compact cameras entirely, scrolling through your pals’ holiday snaps on Facebook and Instagram will make it obvious that many still don’t know how to use their smartphone snapper properly.
Apple’s iPhone, and most other top-tier handsets now have excellent optics and easy-to-use software so there’s no excuse for taking terrible vacation snaps.
Here are some holiday tips for taking great travel photos with an iPhone…
Turn off the flash
Even though the iPhone’s flash is better than most, pictures will look better if you ditch it completely. Instead try shooting in natural light, or tinker with the brightness settings after you’ve taken your snap.
It’s also a good idea to ditch the digital zoom - the more you zoom in, the more detail you lose. It’s far better to take a snap without zoom, then crop it afterwards.
Snap photos with the volume buttons
The iPhone’s volume buttons act as handy shutter buttons that make it feel like you’re using a real camera if you’re taking pictures in landscape. While tapping the onscreen shutter button has a tendency to knock the phone slightly, it’s easier to hold it still and get a clearer snap while using the button on the side of the handset. This is also handy for selfies.

Just make sure you check your volume levels afterwards as you may have accidentally turned the volume down to mute or up to painful levels.
Shoot from different angles
Most camera snaps are taken from the chest height of an adult, which can make them incredibly monotonous. Instead, try altering the angle of your phones by climbing up high or getting low down towards the ground. You could even try a selfie stick for high angles, if that’s you’re thing.
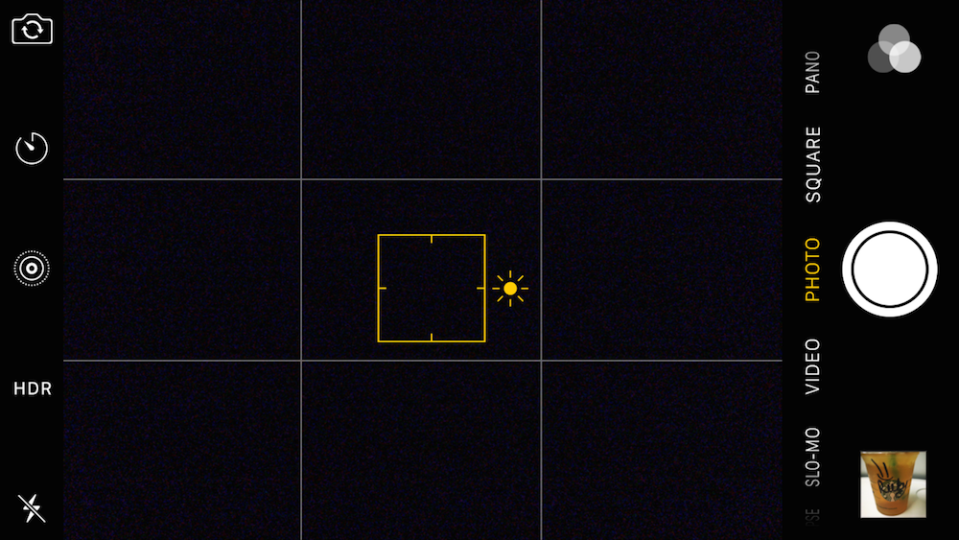
Use the ‘lock focus’ feature
Tapping the screen while taking a snap will set the camera’s focus - just tap on the thing you’re taking a picture of. However, if you move the phone, the focal point disappears.
To fix this, you can use the ‘lock focus’ feature by pressing the screen for a couple of seconds rather than just tapping. This brings up the AF Locked box which will stay in place no matter how much you move the phone around. Just hold down again to get rid of it.
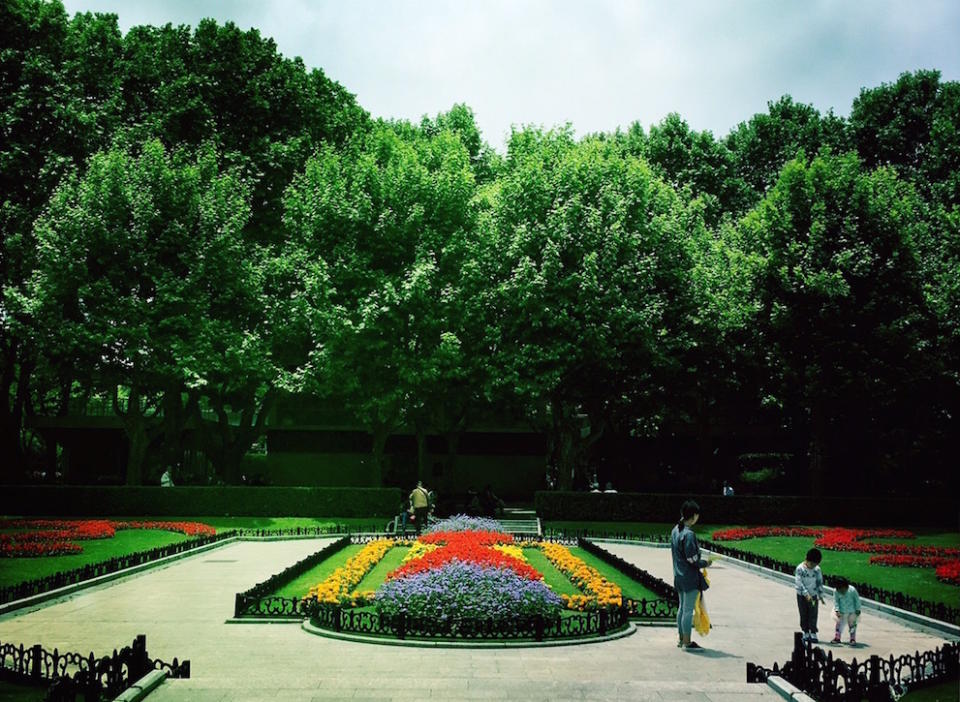
Follow the rule of thirds
One of the best ways to improve your smartphone snaps is to follow the ‘rule of thirds’. This classic photography rule divides the image up into a grid of nine squares and makes it easier to compose a better picture. All you need to do is line up whatever you’re shooting along the imaginary lines, rather than right in the middle of the picture.
The iPhone has a handy ‘rule of thirds’ grid that can be turned on by heading into Settings, followed by Photos & Camera, and toggling on Grid.
Turn on HDR
HDR stands for High Dynamic Range and and will improve your snaps by taking three simultaneous images - one bright, one dark and one ‘normal’ - and automatically merging them into the best possible shot.
It can be turned on and off by taping the HDR icon at the top of the camera screen - Auto mode is the best option.
Use Burst mode for action shots
The iPhone’s burst mode is perfect for snapping action shots like someone jumping into a pool. Simply tap and hold down the onscreen shutter button or the volume up button and the phone will take up to 10 photos per second. You can then swipe through to find the best shot and ditch the rest.
Experiment with apps and filters
Most people know about Instagram filters, but the iPhone also has its own range that can be accessed by firing up a photo you’ve taken and tapping on Edit on the top right corner. The three circles at the bottom of the screen will lead you to a wide range of filters.
It’s also worth experimenting with third-party apps like Hipstamatic, and VSCO which let you choose from a number of virtual films and lenses, and Prisma which can transform snaps into painting-style images.
Always edit your photos
The iPhone makes its incredibly easy to edit you snaps, and just altering one or two minor things could make the difference between a beautiful shot and another generic holiday photo. Unless you’ve somehow managed to take the perfect photo, you should edit every single shot you take.
Tapping Edit on the top right of each photo will enable you to crop, straighten up horizons and adjust the colour, contrast and brightness. It’s worth experimenting as you can just tap Cancel to undo any changes you make.
Snapping sunsets
Smartphone photos of sunsets rarely live up to the real thing, but it is possible to get a decent snap if you know the basics.
Ideally, you need something in the foreground, whether that’s a person or a building, rather than just an expanse of sky.
Make sure that HDR mode is on. Tapping the focus on the bright sky will turn the picture dark while tapping on the dark foreground will totally wash out the sunset. Try to find a spot that’s somewhere in the middle and grab multiple shots. Pick the best one and then be tweak the light levels and colour saturation using the edit settings. Adding a filter can really make the colours stand out.
Image credit: WestEnd61/REX/Shutterstock
