
 Yahoo News
 "VCA groups are simply controllers rather than group channels, with no audio going through them": How to make use of VCA grouping in your mixdowns
VCA grouping is a powerful feature that can be just what you need when you’re mixing, but what are its benefits and how do we use it? That’s what we’ll be tackling in this masterclass today.
We usually associate VCAs with synths, where the voltage-controlled amplifier/attenuator (VCA) is a key component of the output stage. So how did this name end up being used for a grouping tool? For that we need to go back to analogue mixing desks and more specifically, desks that included fader level automation.
By incorporating a VCA into the channel output stage it became possible to have a controlled and thus automated fader level, albeit one where the fader didn’t move. Desk designers then added VCA group faders, and by the flick of a switch you could then control the level, mute and solo of multiple faders.
This all sounds pretty close to the concept of submixing, which we looked at in another tutorial, but the difference here is that the VCA groups are simply controllers rather than group channels with no audio going through them. In practice this makes them very useful for certain types of mixing tasks. In this tutorial we’ll show you how you set them up, general usage aspects and the specific tasks they make possible.
VCA grouping is a handy option that becomes increasingly useful as your mix progresses and you need to make finer adjustments without compromising what you already have. It complements rather than replaces submixing but it’s not available in all DAWs: check out the Pro Tip for some alternative approaches.

The implementation, naming and features of VCA grouping vary from DAW to DAW. That said, the underlying setup process is consistent. To get started, you need to create a VCA master or group track. This acts as a controller for any assigned tracks, and will most likely have a fader but no regular insert slots.
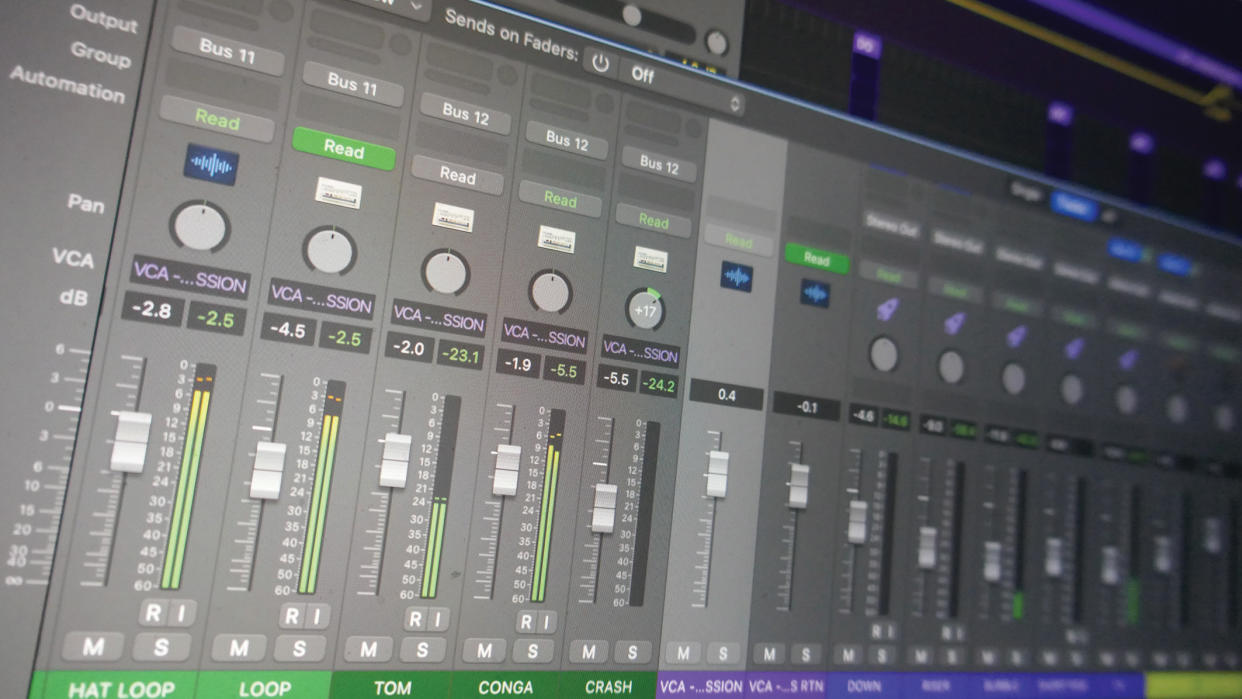
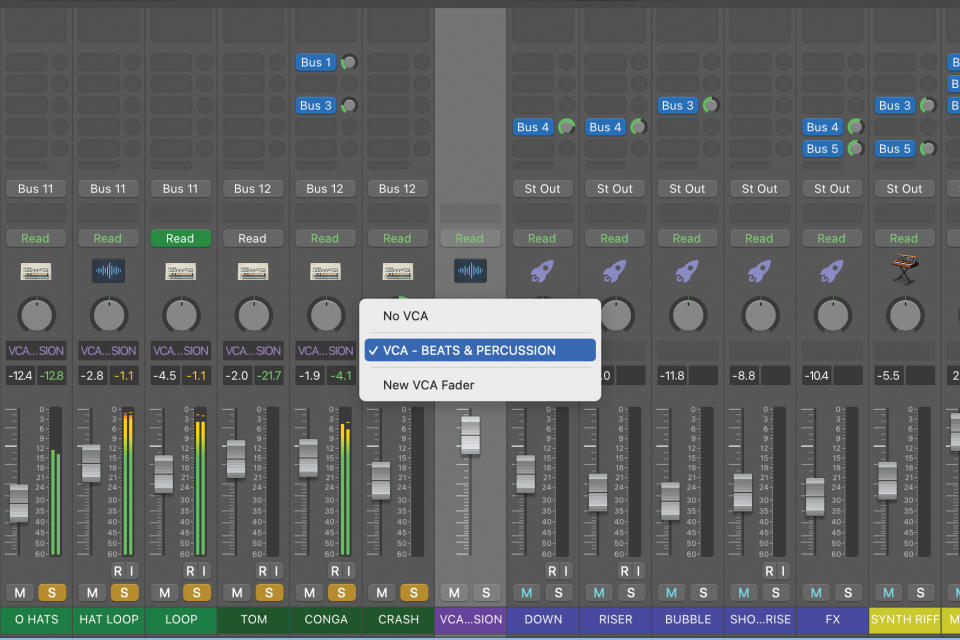
Here in Logic Pro, creating the VCA group not only adds the fader to the mixer but also reveals the VCA allocation slot if it was hidden, and this appears below each track pan. Meanwhile, in addition to the level, you’ll see the VCA group channel includes mute and solo, and it’s automation-capable, which is very handy.

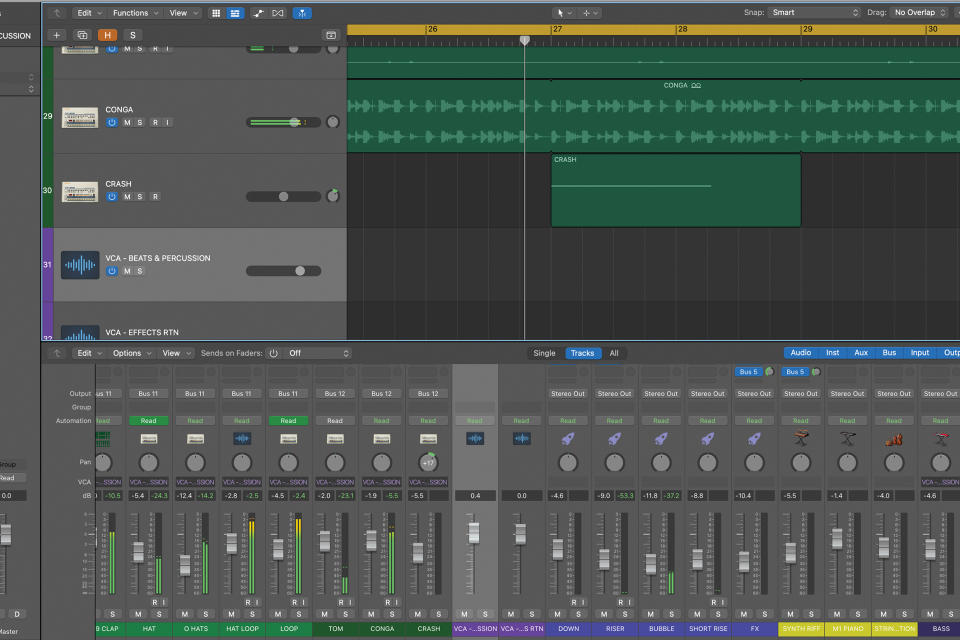
As an example, above, we have multiple individual tracks making up the drums and percussion, and we need overall control of them to finesse our mix balance. We’ve introduced track-specific automation where needed. By adding a VCA group and assigning all our drum and perc tracks, we can adjust all component levels collectively.

Significantly, the VCA does not defeat the existing track-specific automation, so this continues on a track-by-track basis. Also, in Logic Pro moving the VCA group fader doesn’t actually move the assigned faders, which is confusing. Overall it’s probably easiest to think of the VCA fader applying a gain offset to all assigned faders.
Now, consider auxiliary sends. We normally set these so they’re ‘post fader’ and as we adjust the fader level, the associated send level gets adjusted accordingly. Using a VCA group to adjust levels lets us retain this behaviour. In contrast, adjusting a bussed submix doesn’t do this, and auxiliary sends may need manual adjustment.
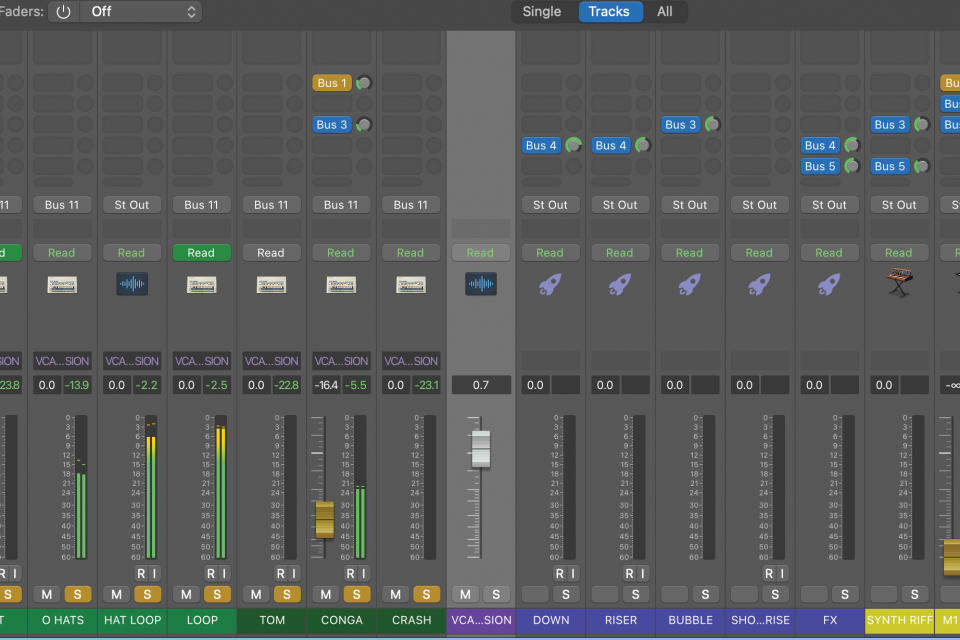
Returning to our drum and perc tracks, you’ll see we’ve already created a submix for the main beat aspects (kick, snare, clap, and hats) and a submix for the remaining percussion. One further benefit of using a VCA group is that it can collectively control a bunch of faders that are routed to different submixes. That’s what we’re doing here.

Sticking with the submix topic, if we’re using a level-dependent processor (compressor for example) on our submix(es), then adjusting fader levels routed to that submix will influence that processor. Here, we can use our VCA group level to easily push the compressors on both of our beats and perc submixes via one fader.
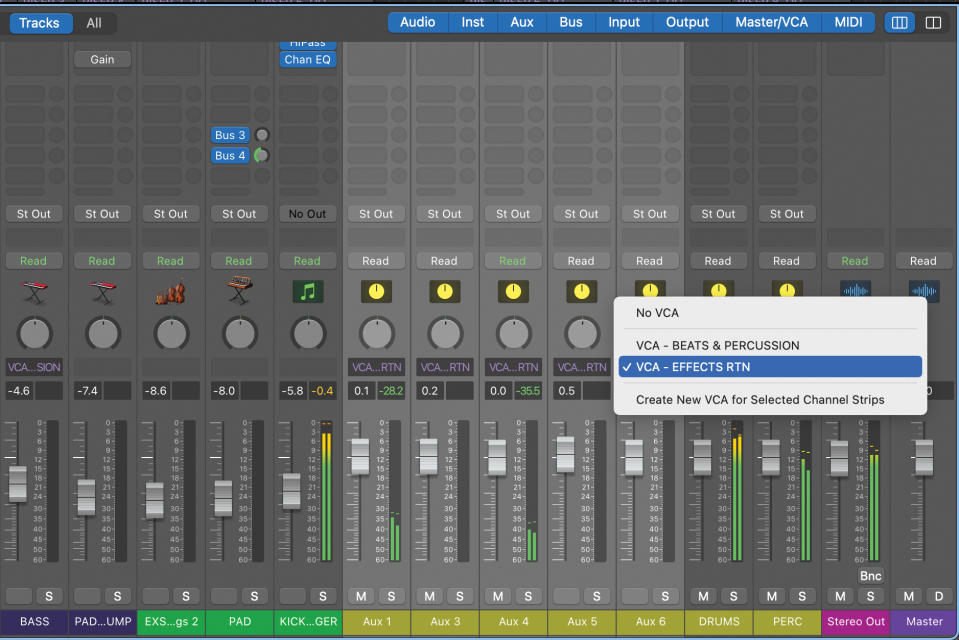
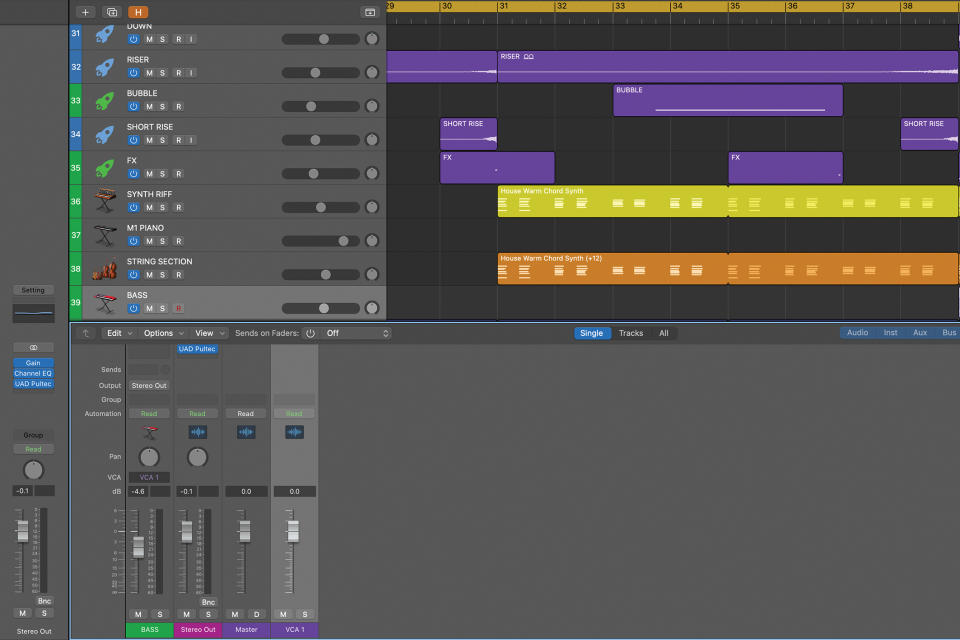
VCA-level control of multiple faders is ideal for overall rebalancing of your mix and avoids compromising existing components such as automation and auxiliaries. In the case of the latter it’s also ideal for collective control of returns and here we’ve created a VCA group for all our auxiliary return channels.

Your DAW may include some further VCA-related features. In Cubase, you get well implemented VCA options that use its link group system. The easiest way to create a new VCA fader is to select the tracks you want to control, select the Link option at the top of the MixConsole and choose Use VCA Fader in the settings panel.
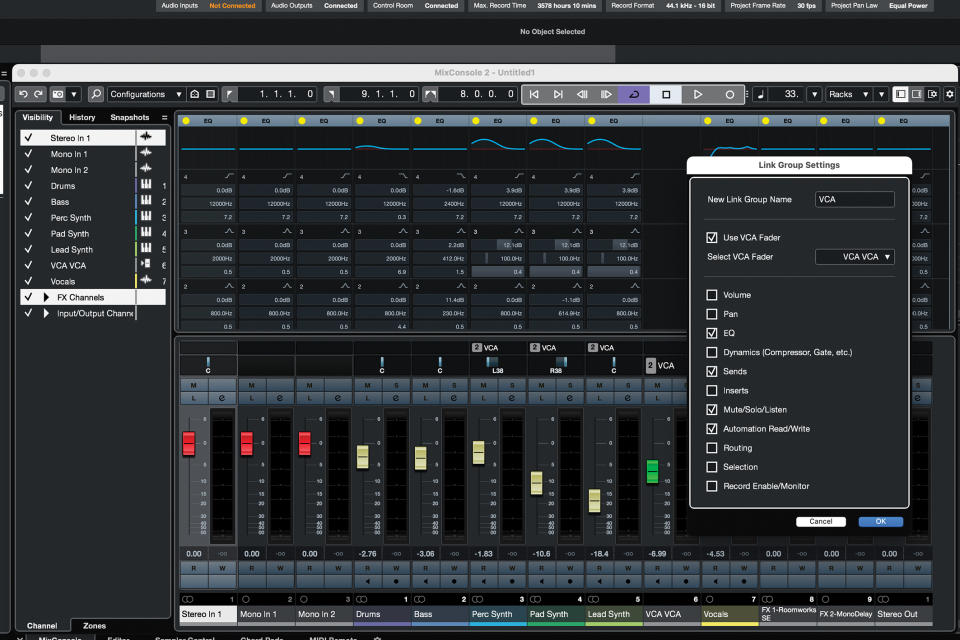
In addition to the parameters you’d typically expect for a VCA such as volume, mute and solo, Cubase’s link group system also includes multiple other options such as EQ, sends, and routing. This provides quite powerful linked behaviour across multiple channels to complement your VCA group.

In Studio One the VCA implementation is pretty much as expected and not particularly complex. However, it does include a handy option for folder tracks whereby you can add a VCA channel for a folder. This automatically assigns the component tracks to a VCA and also includes a tied show/hide option for the mixer Console.
Alternatives
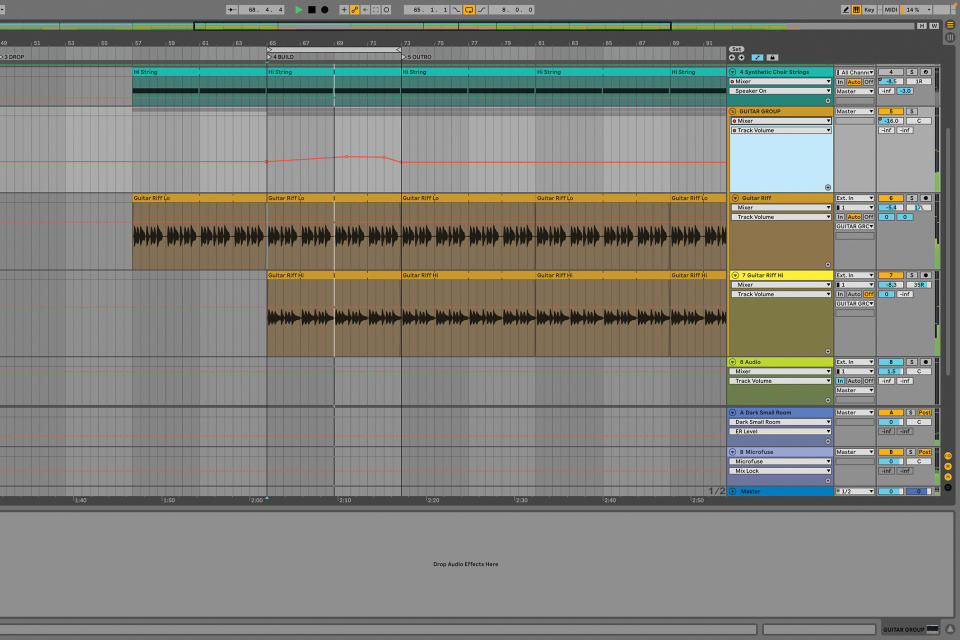
Although most DAWs now include dedicated VCA faders or groups, there are some exceptions, most notably Ableton Live. That said, most DAWs include other ways to group and control your tracks, and often these will achieve similar functionality. For example, folder tracks are a pretty common option that give a quick way to combine multiple tracks and apply an overall level change. Equally, more traditional group settings can link multiple tracks.
If you just want to make a single change to the level of multiple tracks, simply selecting them all and moving one fader does the trick. As discussed in the main tutorial, things can get tricky if you have existing automation. In Ableton Live, there’s a simple grouping system that creates a Group track for a bunch of selected tracks. It may not be as focused as a dedicated VCA option, but it will let you adjust the level of multiple tracks, even with automation. It also controls the individual track post-fader levels rather than simply submix the signals, so track auxiliary send levels are also adjusted in line with the main Group fader level.

