
 Yahoo News
 Office Q&A: Mask and merge Access input, detour Outlook replies

In this month's Office Q&A column, you'll learn how to merge Access input mask characters into a Word document, how to avoid downloading lots of unwanted replies in Outlook, and how to use a mysterious Track Changes behavior correctly. There's no example file for downloading this month.
Retain Access input mask characters during merge
Ayoob merges Access data with a Word document, but Word drops characters from the Access data. Specifically, he's losing characters displayed by an Access input mask. He'd like to merge the mask characters so he doesn't have to reformat values once they're in Word.
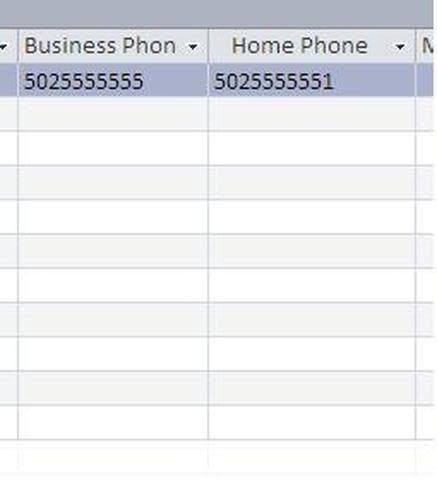
An input mask defines what users see when entering data. Masks take the guesswork out of entering data and help maintain data consistency. Phone numbers are a good example. As you can see in Figure A, without an input mask, the phone number field is left to the best guess of the user. An input mask displays characters that guide the user. Masks provide data validation and prevent users from entering invalid or incomplete values.
Figure A

Use an input mask to guide data input.
An input mask isn't the same thing as a format. An input mask guides users during input; a format displays a stored value in a specific way. When creating an input mask, you can choose whether to store the mask characters with the data. Figure B shows stored values at the table level. Even though the data entry form displays mask characters, Access doesn't store those characters with the value at the table level unless you tell it to. That's what happened with Ayoob's merge. His input mask property wasn't storing the mask characters along with the value. Access can't send mask characters that aren't stored with the value.
Figure B
Usually, you won't store input mask characters with data values.
So what's the cure? If you're still in the planning stages and you control the database, you can choose to store the input mask characters with the value. Then, when you export or merge records, the mask characters will go with the values. Unfortunately, if you make this change after the fact, Access won't adjust existing values. When this is the case, use a query with an expression to add the mask characters to send data to the merge.
Avoid unwanted replies in Outlook
Linda frequently sends email to her entire company. They're informational and she doesn't need replies, but she still gets them -- a lot of them. She wants to block replies from cluttering her Inbox. There's no feature in Outlook that lets you block replies, but Linda can still avoid getting all that feedback.
Perhaps the easiest solution is to set up a dummy account. Then, use the Direct Replies To option to send replies to the dummy account as follows:
In the New Email window, click the Options tab.
In the More Options group, click Direct Replies To.
In the resulting dialog, check the Have Replies Sent To option in the Delivery Options section.
By default, Outlook will list your current account. Change that to the dummy email account (Figure C).
Click Close.
Figure C

Recipients might still reply to Linda's email, but those replies will go to the dummy account, and Linda can decide in her own time how to deal with them.
The second option is to use a rule to delete the replies as they come in. In this case, Linda can use the original email's subject text as criteria. If recipients alter the subject text before replying, their replies still might end up in your Inbox, but a rule will catch most replies. Remember that the text you enter as criteria must match your subject text exactly, so copy the subject to the Clipboard if possible. To set up the rule, do the following:
Click Rules in the Move group on the Home tab and choose Manage Rules & Alerts.
In the resulting dialog, click New Rule.
Choose Apply Rule On Messages I Receive in the Start From A Blank Rule section and click Next.
Check the With Specific Rules In The Subject option.
In the bottom pane, click the Specific Words link.
In the resulting window, paste the subject text from the Clipboard or enter it exactly as the email's subject text (Figure D) and click Add.
Check Delete It or Permanently Delete It in the Step 1 list and click Finish. If you want to keep the message, you can set up a folder and move the replies to that folder instead of deleting them.
Click Close.
Figure D

As emails arrive, Outlook will compare the subject text to the text entered it #6. Outlook will delete incoming messages that are a match instead of downloading them into the Inbox.
Word Track Changes mystery solved
Meena has been using Word's Track Changes feature with a co-worker with no problem. The original author's edits were in blue; Meena's edits were in red. Then, Meena modified her user name and that changed. All edits are in now in red -- both the author's and hers.
The problem wasn't the new user name. I asked Meena to check the Color options for edits. (On the Review pane, choose Change Tracking Options from the Track Changes dropdown in the Tracking group.) When set to By Author, as shown in Figure E, Word distinguishes edits by different reviewers. When set to a specific color, Word uses color to distinguish between different kinds of edits.
Figure E

Use color to distinguish edits by reviewers or by edit type.
Send me your question about Office
I answer readers' questions when I can, but there's no guarantee. When contacting me, be as specific as possible. For example, "Please troubleshoot my workbook and fix what's wrong" probably won't get a response, but, "Can you tell me why this formula isn't returning the expected results?" might. Please mention the app and version that you're using. I'm not reimbursed by TechRepublic for my time or expertise, nor do I ask for a fee from readers. You can contact me at susansalesharkins@gmail.com.
