
 Yahoo News
 How to Make a Survival Knife Out of Stuff You Already Have in Your Garage
My desk job can sometimes leave me lacking a sense of accomplishment. My office successes, while meaningful, are all too often buried under the sound of incoming e-mails, reminders for the next meeting, and the steady hum of the computers that simultaneously serve as a window into the world at large and a chain securing me to my desk. Electronic accolades aren’t always enough to scratch that primitive itch I can’t help but feel as I close up my laptop, rinse out my coffee cup, and prepare for the commute home.
For a more concrete sense of accomplishment, I turn toward the knuckle-splitting reality of my home workshop. I tinker on cars, build a tree house for my kid, and make knives—not as a means of employment, but as a means of fulfillment.
And that fulfillment is the real value of these hobbies. Sure, I could pay someone to work on my car, and a decent knife doesn’t cost all that much. But there’s something to shaping the world around me with my bare hands. Using my tools as an extension of myself, I can bend, grind, and cut steel until something exists that didn’t before. Where there was once an old file well past its prime, there is now a tool with real value. A well-crafted knife has a beauty to it, and with that beauty comes a deep sense of satisfaction.
Getting started
Knife making can be complex, but it doesn’t have to be. You can create some incredible pieces using things you either already have lying around or that are available for cheap at your local hardware store.
While there are lots of companies out there that specialize in selling high-quality steel forged specifically for knife making, a more affordable place to start is at the bottom of your toolbox, says Paul Brach, a knifemaker for more than 30 years. Old tool files, in particular, make for great knives because they tend to be made out of higher-quality steel and are already formed in a workable shape.
Plus, there’s something special about working with what you have. “There is a certain satisfaction that comes from giving new life to these things rather than letting them go to waste,” Brach says.

Design your blade
For your first attempt, Brach recommends a standard survival knife shape similar to the Marine Corps Ka-Bar design. This shape’s long cutting edge is bolstered by a tapered edge on the top of the blade, making it well suited for both cutting and piercing. The steel of the blade extends through the handle (commonly referred to as “full tang”), and it retains its full thickness along the spine of the blade, making it very strong.
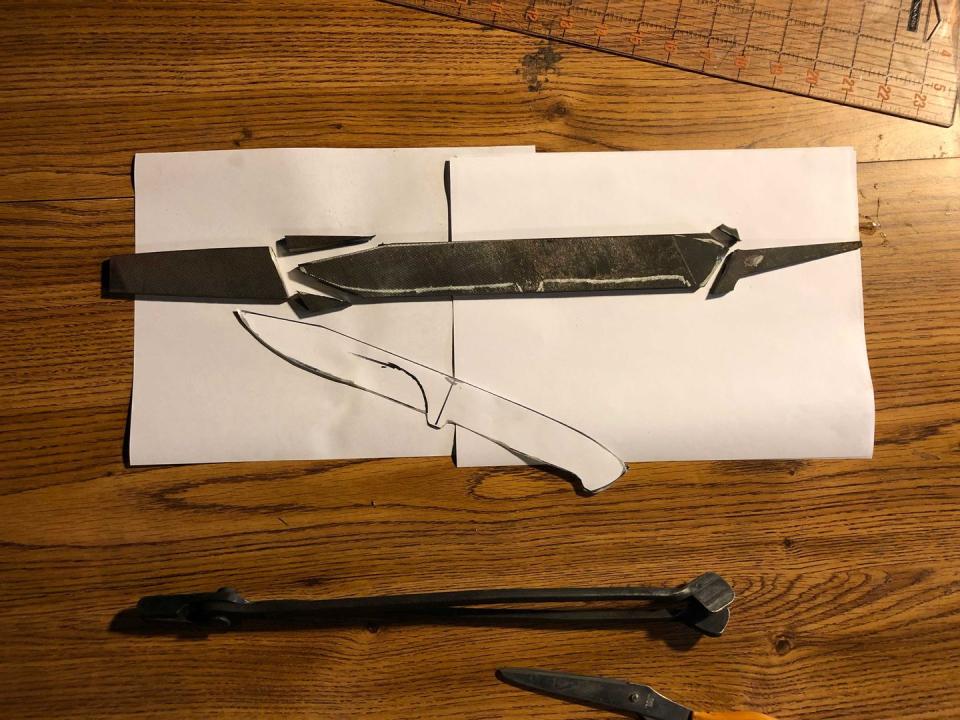
Sketch out your shape to scale on paper by tracing an existing blade or drawing freehand using a reference image. The sketch doesn’t have to be perfect, but it should resemble the profile of the knife you intend to make. Cut the drawing out and trace it onto your file using a permanent marker. Save the cutout—the marker will fade under heat, so you may need to redraw lines as you work.
Grind the profile
Put on your safety glasses and either clamp the file to a sturdy table or place it in a vise. Use the cut-off wheel on your angle grinder to begin roughing out the basic shape of the knife. Cut straight lines that are slightly outside the curved shape of the blade.
Once you’ve removed as much material as you can, swap in the grinding wheel. Begin shaping the steel into the final profile of the blade and handle.
Center-scribe the metal
Lay the knife flat on your workbench or table and lay the drill bit next to the blade, with the tip of the bit facing what will become the knife’s sharp edge. Leave the bit flat on the table as you press its tip into the edge of the metal, and scrape a line down the length of what will become the cutting surface of the knife.
Now flip the knife over and repeat, scratching another line down the length of the blade using the drill bit. If your bit is the same width as the metal, both lines will overlap. If the bit isn’t an exact match, there will be two lines. In that case, the space between the two lines will be your centerpoint when grinding out the blade’s edge.
Grind the edge
When shaping your blade’s edge, Brach recommends holding the angle grinder tight to your sides and moving your body at the hips, rather than your arms, as you grind. Start near the handle of your knife and grind toward the tip of the blade, being intentional and careful not to slip the grinder off the blade and cut yourself. Leave the blade edge about as thick as a dime.
“It’s important to keep your grind symmetrical, removing the same amount of material from each side,” Brach says. Otherwise, you’ll increase the chance of a significant warp during heat treatment.
This step will take some time, depending on the power of your angle grinder and how detail-oriented you choose to be. It could take 20 minutes (for a rough-cut utility knife) or several hours (for a finer piece of cutlery).
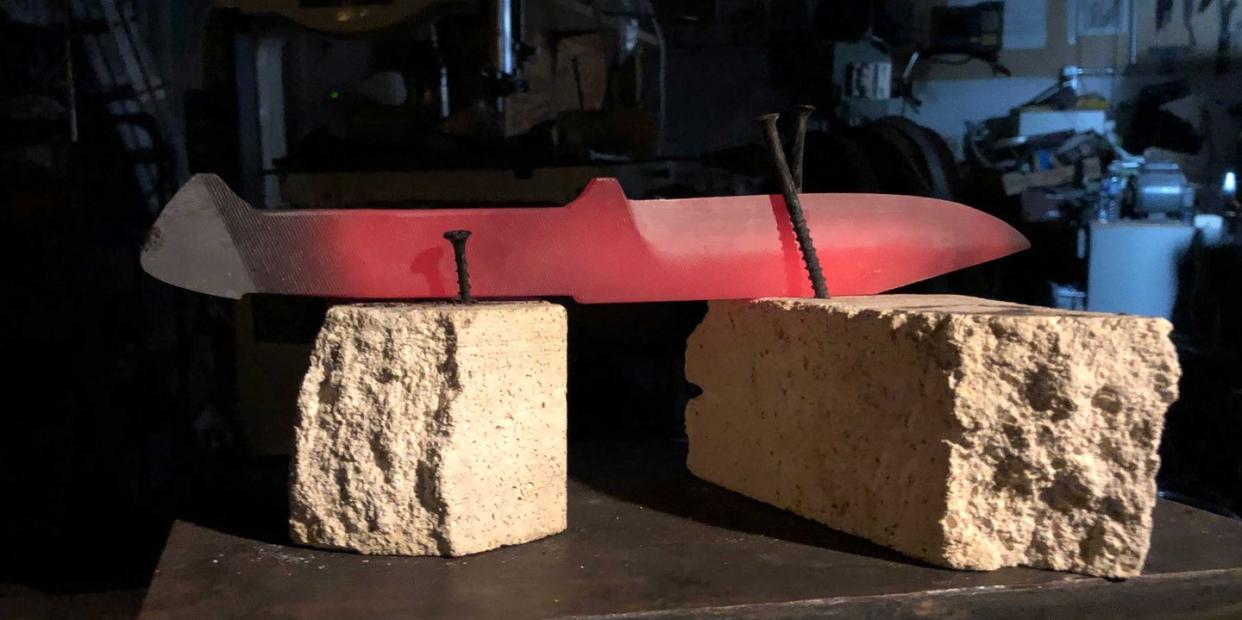
When you’re done grinding, you’ll have a knife that could handle a number of jobs—but until you treat the steel properly, it won’t offer the longevity or resilience you’d expect.

Heat the blade in your DIY forge
Light the charcoal in your grill. Feed the nose of the hairdryer into one end of the pipe and stick the other end of the pipe next to the burning coals. The combination of high-temperature charcoal and forced hot air will create embers hot enough to heat-treat your blade. Hardwood lump charcoal will be hot enough to work with—more than 1,500°F—in around 15 minutes and will burn at that heat for about an hour. (You’ll have to add more charcoal once or twice during the process.)
Using your tongs or pliers (and gloves or an oven mitt for added safety), place the blade on its side in the coals (so the edge is facing up), with the forced air on and the embers burning.
Normalize the blade
Normalizing your blade’s steel helps relieve stress in the grain structure during the cutting and grinding processes. Heating the blade and allowing it to cool reorganizes the steel’s microstructure, making it more consistent and strong throughout.
Leave the blade in the forge until it’s glowing orange but not quite bright orange (with your forge at 1,500°F, this should take about 15 minutes). You can use a magnet at the end of a pole to see if your blade is hot enough. When the steel reaches a temperature called the “Curie point,” it will no longer be magnetized. The heat disrupts the alignment of the atomic magnetic moments within the steel, causing them to stop reinforcing each other and eliminating the magnetic attraction.
“It is important to be sure the steel reaches an even color with no dark shadows present within the orange glow,” Brach says. “Shadows will create soft spots in the steel.”
Once your blade is hot enough, use the tongs to remove it and let it cool on its own until it reaches room temperature (about an hour). Repeat this heating and cooling process, but the second time, remove the knife when it’s heated to a slightly dimmer shade of orange, after around 10 minutes.
Harden the blade
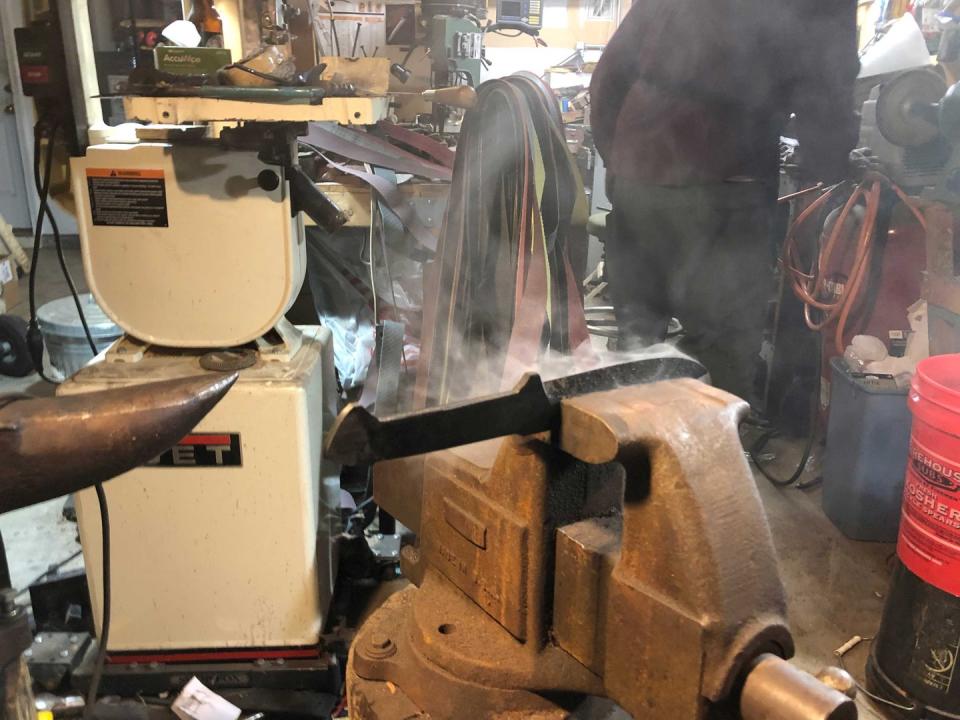
Heat the blade to an even orange color one more time, but this time, immediately quench it in the metal pail of warm vegetable oil (between 100°F and 120°F).
Quenching the blade in oil rapidly reduces the temperature of the steel, trapping carbon in solution and making the steel harder. Make sure to completely submerge the blade while keeping a grip with your tongs; otherwise a fire could spark on the surface. (If a fire starts, don’t panic: It will be small and contained—you can usually just blow it out like a candle.)
Make a subtle cutting motion with the blade through the oil for 30 seconds. If you want to check its hardness, let it cool completely on a rack.
“If your blade has properly hardened, once it is cool you should be able to run a worn file along the edge and the file will skate on the surface of the steel rather than cutting,” Brach says. “If the file bites into the steel, reheat it in the fire to the even orange temperature, let it soak at that temperature for 10 minutes, then quench it again.”
Temper the blade in your oven
Tempering the blade softens the metal slightly so it won’t be too brittle. Take the knife from the oil bath or off the rack, and place it on the center rack of a 375°F oven. Bake for an hour, then remove the knife to let it cool completely. Repeat the baking process once.
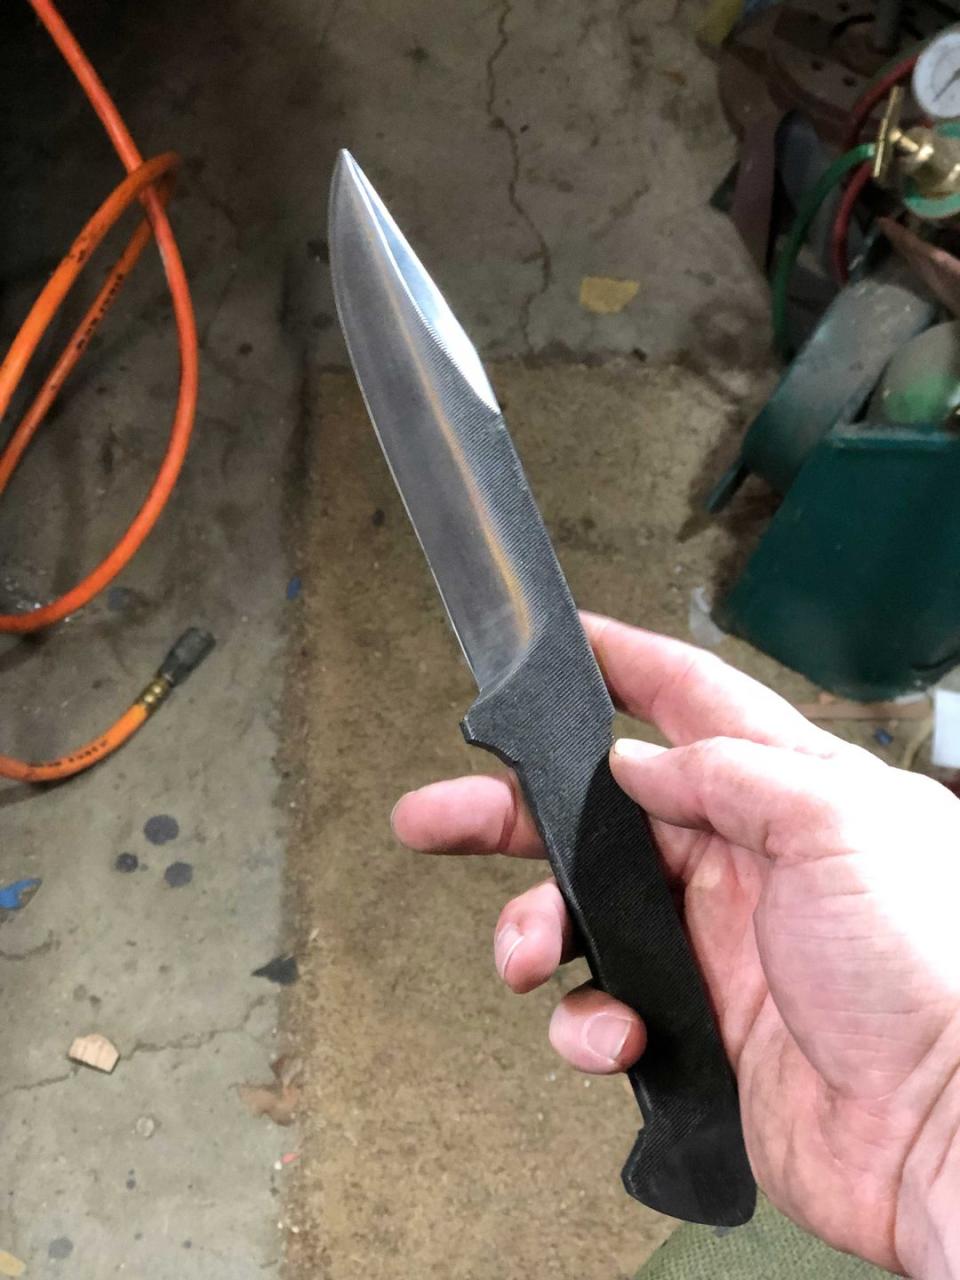
Sharpen the blade
You can now grind your blade edge down to that centerline using your angle grinder and the flapper wheel. Pay close attention as you sharpen the knife. Once burrs begin to appear on the edge of the blade, it’s as sharp as you’re going to get it with your angle grinder. At that point, switch to a knife sharpener to finish off the edge.
Wrap the handle
Wrap the handle in paracord or in strips of recycled leather to add grip and comfort. A few feet of either material will suffice, but if you have some to spare, braiding the material before you wrap it around the handle will give your knife a more impressive look.
“If you use a cord-wrapped handle, it’s important to secure it to the tang, preferably with slow-set epoxy, to ensure the grip does not slip forward onto the cutting edge during heavy use,” Brach says.
Apply the epoxy to the handle of the knife and lay the first few inches of the cord along the handle. Then wrap the remaining cord tightly around the handle and over that first piece of cord until both are completely covered. Tie off the end with a secure knot.
You Might Also Like

