
 Yahoo News
 Pro tip: Automate image creation using the System Image Utility
In a previous article, I discussed how to create NetInstall and NetBoot images. The NetInstall image created was merely a network-based image that could be used to install OS X from an OS X Server hosting the image and utilizing the NetInstall service.
In this article, I'm customizing the System Image Utility image creation process using Automator to create a workflow that will carry out many of the redundant tasks associated with deploying an OS to many client devices.
Before we get started, here are the requirements:
Apple computer running OS X (10.7+) as a reference workstation
Install OS X.app (Mac App Store)
Apple computer running OS X Server (optional; required only if deploying via NetInstall)
NetInstall service (optional; required only if deploying over a network)
Switched network (optional; required only if deploying 1:many)
External HDD (optional; required only if deploying 1:1)
Administrative credentials
Let's review the steps necessary to create an automated image with the System Image Utility.
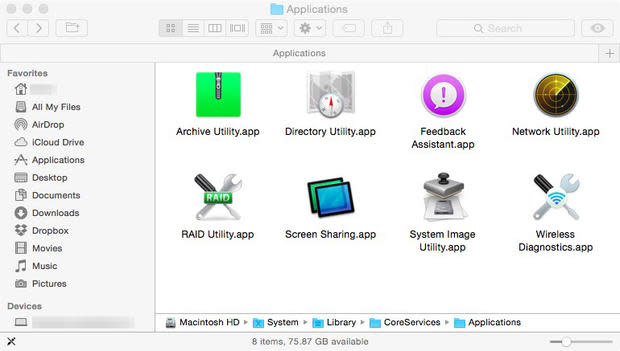
On the reference workstation, launch System Image Utility.app (Figure A) by navigating to the following path:
~/System/Library/Core Services (10.7-10.9)
~/System/Library/Core Services/Applications (10.10 only)
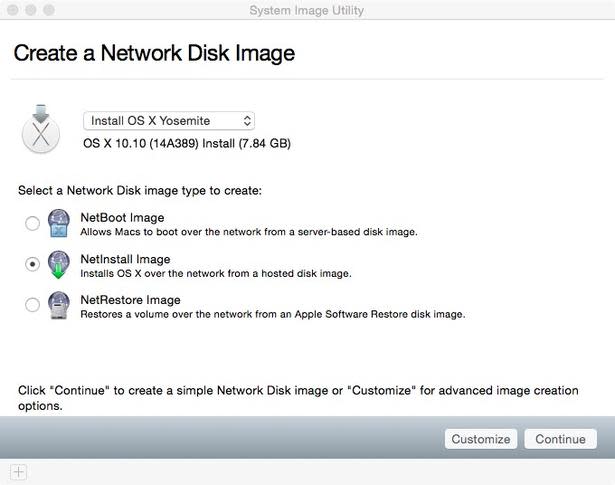
Figure AFigure A By default, the Install OS X.app file downloaded from the Mac App Store is downloaded to the Applications folder. If it isn't there, System Image Utility won't find the required source location and will fail to proceed. Once the file is copied to the Applications folder, System Image Utility will allow for the creation of a Network Disk Image. Select NetInstall Image and click Customize (Figure B).
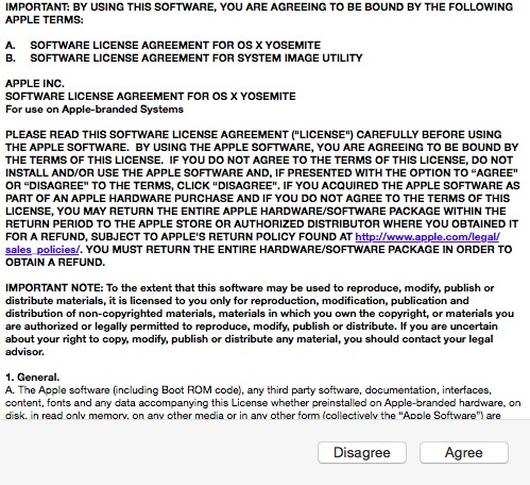
Figure BFigure B Agree to the EULA to proceed (Figure C).
Figure CFigure C On the following screen, there will be two windows presented: The System Image Utility (Figure D) and the Automator Library (Figure E).
Figure DFigure D
Figure EFigure E As depicted in Figure D above, the first entry in the workflow is Define Image Source. This must always be the first entry, otherwise the image creating process will fail. There's a second workflow already added called Create Image. This must be the last entry in the workflow, as this processes how the image is created -- and thus, the entire operation will fail if it isn't the last entry.
Adding workflows is a modular process, which means they are all self-contained and may be added in any particular order outside of the first and last entries mentioned in step #5. Selecting the Partition Disk from the Automator Library, drag the entry over to the System Image Utility to add that workflow, and link it below the first item. Configure the entry as it suits your environment by selecting partition tables, naming, format types, and disk sizes that will be configured automatically by the image on destination computers (Figure F).
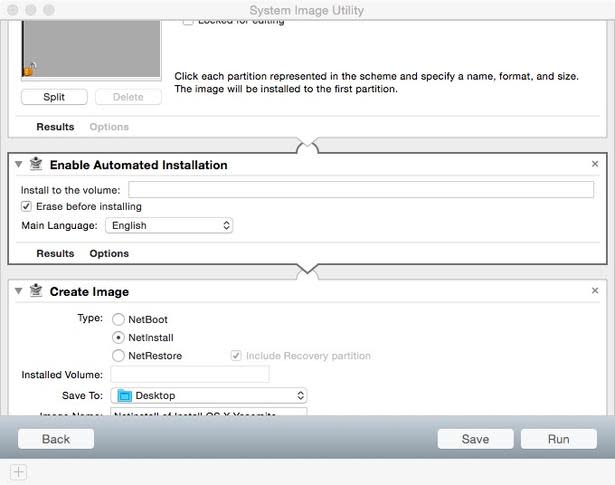
Figure FFigure F Next, drag Enable Automated Installation and link it below the previous entry. Enable Automated Installation controls how OS X will be installed, particularly the Language and what partition it should be installed into based on the name of the volume. By default, the Erase before installing checkbox is checked. If selecting Partition Disk as an entry, that workflow will handle the formatting of the disk prior to installation (Figure G).
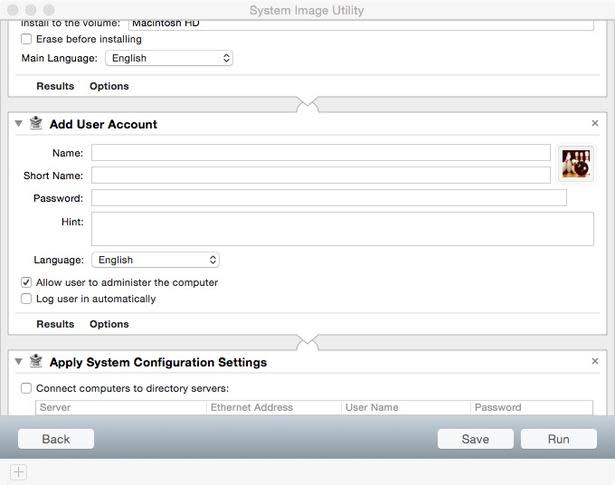
Figure GFigure G OS X requires at least one admin-level account to be created post-installation. Using the Add User Account workflow, such an account can be scripted by entering the Name and Short Name of the account, as well as the Password that will be assigned to the account. Additionally, the Language and account picture may be configured, along with placing a check next to the Allow user to administer the computer if the account is to be granted administrative privileges. If several local accounts are required, this workflow may be added as many times as necessary and configured so that the accounts are created during this phase (Figure H).
Figure HFigure H
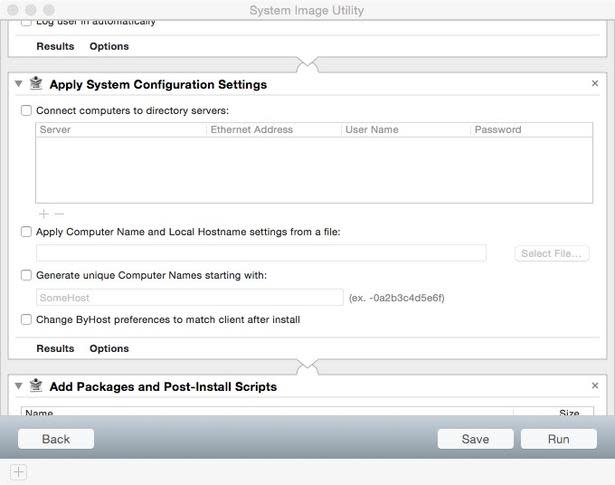
Note: At this time, the existing workflows are all that's required to automate an OS X installation. If you wish to jump to the creation portion of this article, go to step #12. However, there are a few other entries that might prove useful in steps #9-11.The entry for Apply System Configuration Settings allows control over selecting directory services that devices may be bound to and setting the Computer and Host Names based on configuration files or generated randomly following a specified prefix. These will vary for organizations and may be modified as needed (Figure I).
Figure IFigure I If it's necessary to install software or execute scripts, the Add Packages and Post-Install Scripts entry allows the addition of package installations and/or scripts to automate installs or command executions for specific functions and settings. Clicking the plus sign [+] will allow the addition of these entries to be executed post-installation (Figure J).
Figure JFigure J Another optional, yet highly desirable entry is Add Configuration Profiles for use with OS X's Profile Manager service. By including configuration profiles generated through Profile Manager, devices will automatically be added to the Profile Manager database upon completing OS X installation and will be ready for pre-configured settings and remote management using the MDM service.
As mentioned previously, the final step in the automated workflow should always be Create Image. Configuration of this entry requires selecting NetInstall as the type and selecting a source in Save To. System Image Utility creates names and descriptions for the image file at random and also generates an Image Index, which is a numerical value assigned to each image that must be unique to that image. Values can be anything from 1-4095 if the resulting image is to be deployed from one OS X Server or external HDD. The numerical value should only be set to 4096 or higher if deploying from multiple OS X Servers. Once the workflow is ready for image creation, click the Run button to begin the process (Figure K).
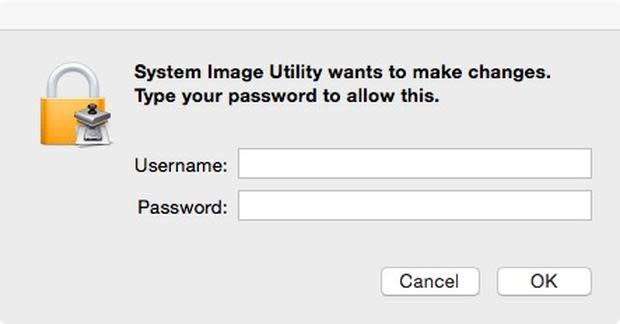
Figure KFigure K During this process, a prompt for administrative credentials will appear. Authenticate, and the process will continue to generate an image file (Figure L).
Figure LFigure L System Image Utility processes the workflow commands quickly with the exception of the last entry. Create Image always takes the longest, since that's where the actual image creation occurs (Figure M).
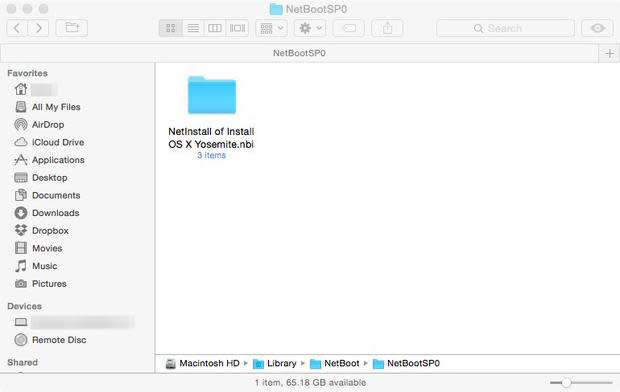
Figure MFigure M Once completed, the resulting .nbi file will be saved at the location designated in the workflow. If deployment of this image file will occur via OS X Server, the .nbi will need to by copied to the following directory of the hosting OS X Server:
~\Library\NetBoot\NetBootSP0If the image will be deployed through USB flash drive or external HDD, copy the file to the desired device and select that as the boot device when attempting to image the computer (Figure N).
Figure NFigure N


Further configuration of System Image Utility using Automator workflows will yield greater results when paired with scripts, package installers, and organization-specific settings.
However, the ultimate goal of imaging is to strike a balance between a thin image (just the OS) and a thick image (OS plus all apps/settings/updates/data). Remember that the larger the image, the longer the process to deploy per machine, and that means more time.
A good rule of thumb is to start with the OS and add only the essentials that apply to every node in your organization. Once the basics are covered, a generic image can be used for most deployments, and add-ons can be introduced via scripts, Profile Manager, or Apple Remote Desktop afterwards without compromising time or efficiency.
